As you can probably tell by now, since I haven't added a new post since August, 2011, I've had some difficulties juggling my time. Still crafting, but not posting what I've been up to.
I've been brushing up on my knitting skills, and making more items for myself. Taking on more challenging crochet projects, and playing more with beads, string, and paper.
Until I'm back in the swing of things and can start blogging again, you'll be able to see more of my WIPs in Ravelry. I'm Cary2Crafty there, too.
You can still contact me - as long as Blogger will let you. I'll keep my same e-mail address. Or - feel free to find me and friend me on Ravelry.
Happy crafting!
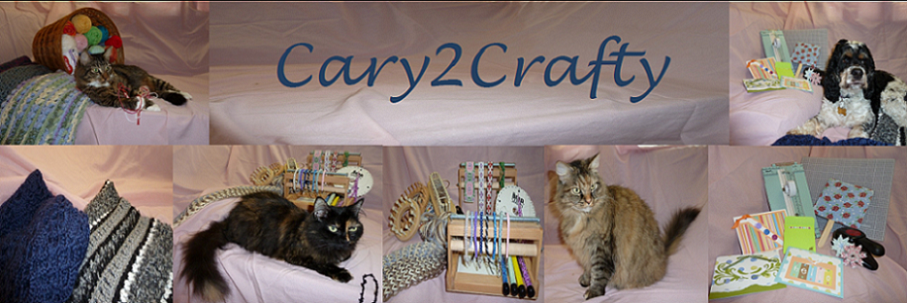
2 crafty. 2 many ideas. 2 much yarn. 2 many pattern books. 2 many craft supplies collecting dust. Time to get moving. Past time to define myself. This begins my journey.
Friday, June 29, 2012
Saturday, August 13, 2011
Something New - Knooking

I made two practice swatches. The blue was made when I was trying to follow the instructions in Leisure Art's The Knook Kit. The purple was made following instructions I found on a blog - Jen's Hooky Place.
 Using The Knook Kit instructions I kept my hook pointed down and didn't yarn over. It was easy enough, but with close inspection it looks like the knit stitches are twisted. I'm pretty sure I didn't follow the purl instructions correctly, but reading them over and over I don't know what I did differently. I think if they extended the instructions a few more steps I would have understood better. So..... I hit the Internet to read instructions on a couple of other blogs, and You Tube to see the videos.
Jen's instructions on her blog Jen's Hooky Place were a little confusing - I learn better visually. So I found her You Tube videos and finally got it. Trying it her way, I think this looks more like knitting. More like crocheting, I had my hook pointed up and I used yarn overs to pull the yarn through the loop. To purl, I understood that you have to start with your yarn in front, but I what I didn't see in the Knook Kit instructions, was that you're supposed to enter the loop from the opposite side. Not right to left, but coming in from the back / left before pulling the yarn through. Or, you can twist the stitch so you can enter the opposite way than the knit stitch. Jen's tip is to hook the loop with the hook first - making it easier to insert the hook from the opposite direction. Hard to explain in writing - that's why the videos are a "must see". With the Knook in the kit, I found the hook a little too narrow to grab the yarn. I'm not sure how I'm going to resolve that - maybe I'll try to file it down some. Now I'm ready to start my first test project - I think the wash cloth in The Knook Kit booklet. Hopefully with this project I'll get more comfortable with the knook and my tension will improve.
Something New - Cuddle Bunny Blanket
 Now that my daughter is driving - better -, I'm able to crochet in the passenger seat. The other day, heading out of town, I was able to quickly crochet this blanket - Lion Brand's Quick & Cozy Cuddle Bunny Blanket using Bernat's Baby Blanket yarn. I had some trouble with backstitching the face, but I came up with a face that works for me. I loved the way it turned out - I plan to make more to give to hospitals for their young patients.
Sunday, July 10, 2011
Rozetti Marina Ruffling Yarn
For the past 2 weeks I've dropped in on the Knit Night at Downtown Knits in Apex, NC. I've really enjoyed both visits, and hope time will allow me to keep going. During the last visit, I saw one of the ladies knitting with a yarn that ruffles. I was fascinated - and hooked. I had to buy some of my own to try out. I had great fun knitting with these - it was so simple! I plan to buy more yarn next week and try out more colors. Check out these 2 scarves.
 |
| Color: Galaxy |
 |
| Color: Vineyard |
Monday, July 4, 2011
Two More Finished WIPs


This shawl will actually be one of my first donations for my new community outreach program - Crafting Blessing. Check my other blog for more information - www.craftingblessings.blogspot.com.
Monday, June 27, 2011
Another Finished WIP


 I finally made the time to finish my daughter's afghan. I think I've been working on it on and off for 4 years. Since she just graduated from high school, I thought it was about time. Plus, she's been begging me. I used 4 different yarns, I don't even know if I can remember them all..... The green is a soft Red Heart, the White is a fuzzy Lion Brand, the black plain Simply Soft was paired with black eye-lash yarn. I thought the main color was going to be green - the way the pattern read. But it looks more like the main color is white. I just hope it doesn't get too dirty. The size turned out shorter than I'd like, and it's extremely heavy. I added several rows of single crochet as a border trying to make it a little bigger - until I started to run out of yarn. Then the final row is picots. The pattern is from Lily Chin's Mosaic Magic - Fair Isle Fancy.
Monday, May 30, 2011
Another Wedding Invitation

Saturday, May 21, 2011
The Wedding Afghan

Tuesday, April 19, 2011
Meet oJo

Sunday, March 13, 2011
Catching up
I'm a little behind in my posting, but I've still been working behind the scenes. I made my New Year's Resolution to complete my WIPS, but I'm afraid so far I've only really been creating more. It's only March, though, so I'm still hopeful. I just need to be stronger..... But today my mom gave me tons of hand-me-downs - fabric and yarn. Oh, the possibilities. I guess I should look at this as more incentive to work those WIPS.
Some WIPS in the making:


Recycling candles. Don't you just hate it when you have a good-smelling candle that you can't light anymore? I recycle.... bought some wicks from my local craft store and brought out the smaller empty candle jars. Just dig out the leftover wax in the candle that won't light anymore, remelt it, add some scented oil, then pour in the waiting empty jar with the fresh wick. I made 6 new candles while working on my Invitation WIP (below).
 I have a cousin who's getting married in May. I requested an advance invitation so I could create an invitation keepsake for her. I asked her mom about colors and flowers, and created from there. I don't usually do much of this, so it's time-consuming for me from creating to execution. I think it turned out well, although I worked on it off and on for several weeks. I was determined to finish it this weekend so I can give it to her at the Bridal Shower next weekend.
 Another WIP I need to get working on is a crochet afghan that will be a wedding gift for my nephew. I think there might be a Bridal Shower in April or May, but I'm not sure. The wedding's in June - right before my daughter graduates from high school. Yep - need to focus on getting this one done. I probably have about 1/4 done on the body.
 Oh, yeah. One of the numerous joys the mom of two teens has is the last-minute requests for something for school, a friend, an activity..... My son had a dance to go to, and he needed a corsage. Well, at the last minute - who can find an open florist??? Luckily the near-by grocery store has a nice selection of price-reduced flowers. A trip to the back yard from some green leaves. I found some Baby's Breath in a silk arrangement - you can't even tell they're not live. The only florist tape I had was white, so that had to do. I found some white ribbon to cover up the sticky tape, added some more ribbon.... I think it turned out nice. At the dance, she felt special. Not many of the other dates bothered with flowers for their girls.
  So, here's the finished Invitation Keepsake for my cousin. The picture is terrible - I should have taken the picture before I put it in the frame. But it was a struggle to get it in the frame, so I wasn't about to take it out again just for a picture. The invitation is ivory with brown lettering. My cousin told me the flowers are going to be blue hydrangeas and cream roses. I usually add quilling to these, but I had no idea how to quill hydrangeas. So, I really had to think about this awhile. I ended up with a combination of scrapbooking and quilling. I used a punch for the hydrangeas and larger leaves, and the roses, buds, and vines are quilled. I had to cut the invitation to mount the front and back - I needed to frame both to complete the picture. I used a double mount - the hydrangea blue directly under the invitation, then sitting on a larger brown rectangle with the quilled design. The background sheet is a beautiful 12 x 12 scrapbook sheet with a linen-look cream that's shiney. I chose black for the wooden frame. My cousin told me the kitchen is black, red, and white, so I thought that might be a sign of their taste for the rest of their home. I hope so!
 Now I'm going to do a little bit of showing off of my daughter's artistic talent. She gets hers from her dad, thankfully. I can do lots of crafting with my hands, but I just can't make a go of drawing and painting. Here are a couple of paintings my daughter created for her high school first year art class.
Subscribe to:
Comments (Atom)